


How to Wash a Fitted Baseball Cap: Key Precautions and Best Practices
A fitted baseball cap offers a snug and stylish fit, but its fixed size and structure make it more vulnerable to damage during cleaning. Unlike adjustable caps, fitted caps require extra care to maintain their shape, size, and overall quality. If you're wondering how to wash your fitted cap without ruining it, this guide will highlight the essential precautions and safe cleaning methods to keep it looking fresh and fitting perfectly.
1. Pre-Cleaning Assessment
1.1 Check the Material and Care Label
Identify the Material: Fitted caps come in various materials, including cotton, polyester, wool, mesh, and leather. Each material has different washing requirements. For instance, cotton and polyester are generally more durable and can withstand more vigorous cleaning, while wool and leather demand gentle handling.
Refer to the Care Label: The care label inside the cap provides specific instructions from the manufacturer. Look for guidance on washing methods, temperature settings, and drying instructions. If the label is missing or unclear, err on the side of caution and choose a gentler cleaning method.
1.2 Examine the Cap's Structure
Brim and Crown Integrity: Fitted caps often have structured brims and crowns that can lose their shape if not cleaned properly. Check for any signs of loose stitching, bent brims, or weakened areas that may require extra attention during washing.
Embellishments and Attachments: Caps with embroidery, patches, rhinestones, or leather accents are more delicate. These features can fade, peel, or fall off if exposed to harsh cleaning methods or strong detergents.
2. Avoiding Common Mistakes
2.1 Never Machine Wash Without Protection
Agitation Risk: The agitator and high water pressure in a washing machine can stretch, twist, or misshape a fitted cap. Even on a gentle cycle, the cap may rub against other items, causing abrasions or tears.
Exception with Precautions: If you must machine wash, always place the cap in a mesh laundry bag to protect it. Use the gentle cycle with cold water and a mild detergent. However, hand washing is still the safer option for most fitted caps.
2.2 Do Not Use Harsh Chemicals
Fabric Damage: Bleach, strong detergents, fabric softeners, and stain removers with harsh chemicals can weaken the fabric, cause color fading, or damage any printed designs on the cap. Stick to mild, pH-neutral detergents specifically formulated for delicate fabrics.
Leather and Synthetic Concerns: For caps with leather or synthetic leather components, harsh chemicals can dry out, crack, or discolor the material. Use leather-specific cleaners and conditioners instead.
2.3 Avoid High Heat
Shrinking and Warping: Exposing the cap to high heat, whether from a clothes dryer, direct sunlight, or near a heater, can cause shrinkage, warping, or melting of certain materials. Always air dry your fitted cap in a cool, well-ventilated area.
3. Recommended Washing Methods
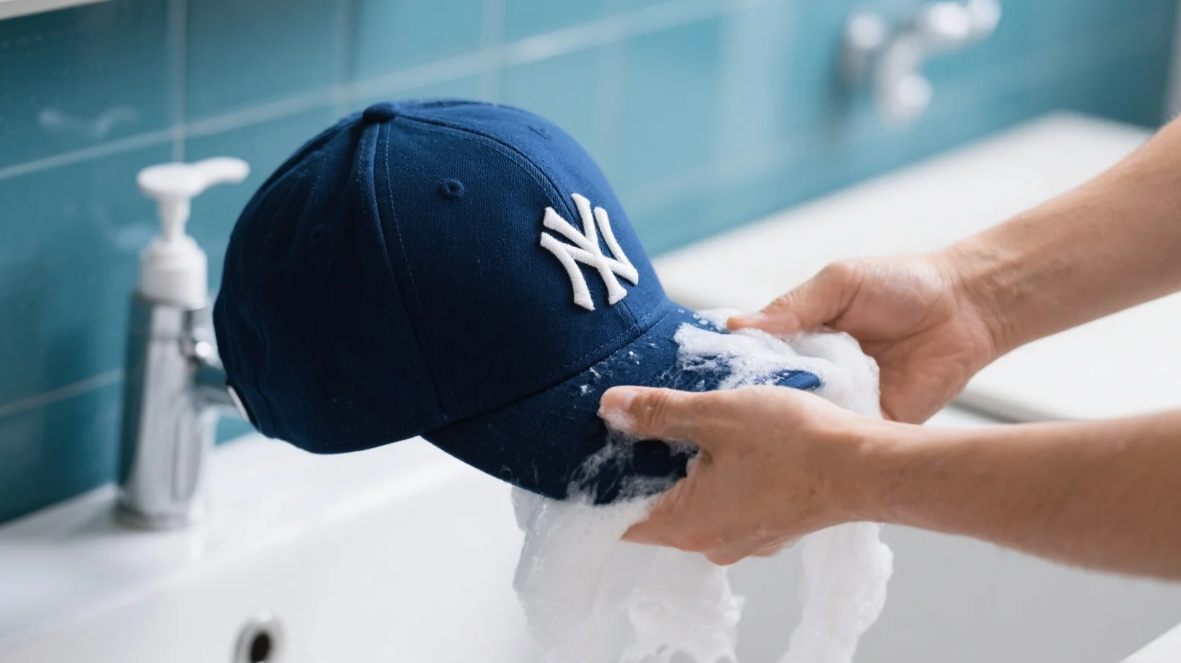
3.1 Hand Washing
Prepare the Cleaning Solution: Fill a basin or sink with lukewarm water and add a small amount of mild detergent. Stir gently to create a soapy mixture. Avoid using hot water, as it can shrink or damage the fabric.
Pre-Treat Stains: If your cap has visible stains, apply a small amount of mild detergent or stain remover directly to the stained area. Gently dab the stain with a soft-bristled brush or sponge, avoiding excessive rubbing that could damage the fabric or stretch the cap. Let the treatment sit for 5–10 minutes.
Submerge and Soak: Submerge the cap in the soapy water and let it soak for 5–10 minutes to loosen dirt and sweat. Gently swish the cap around, but do not twist or wring it, as this can cause misshaping.
Gentle Scrubbing: Use your hands or a soft brush to scrub the cap gently, focusing on the sweatband, brim, and any dirty areas. Be extra cautious with the brim to prevent bending or warping.
Rinse Thoroughly: Rinse the cap with cool water until all the soap is removed. Squeeze out excess water gently, avoiding wringing or twisting.
3.2 Spot Cleaning (for Minor Soiling)
Identify the Soiled Areas: For lightly soiled caps or caps with specific dirty spots, spot cleaning is sufficient. Dampen a soft cloth or sponge with lukewarm water and a small amount of mild detergent.
Gently Blot the Stains: Blot the stained areas with the damp cloth, avoiding rubbing that could spread the stain or damage the fabric. Rinse the cloth frequently and repeat the process until the stain is removed.
Air Dry: Pat the cap dry with a clean towel and let it air dry in a cool, well-ventilated area.
4. Drying and Shaping
4.1 Air Dry Only
Avoid Heat Sources: Never use a clothes dryer to dry your fitted cap. The high heat can cause shrinkage, warping, or damage to any plastic or foam components. Instead, remove the cap from the washing solution and let it air dry naturally.
Choose the Right Location: Place the cap on a clean, flat surface, hat rack, or clothesline in a cool, well-ventilated area away from direct sunlight. Sunlight can fade the color of the cap and heat can misshape it.
4.2 Reshape While Wet
Restore the Original Shape: While the cap is still wet, reshape it gently to its original form. For the brim, you can curve it slightly if it has lost its shape. Use your hands to mold the crown back to its proper fit.
Support the Structure: To maintain the cap’s shape during drying, you can stuff the crown with acid-free tissue paper or a clean, dry towel. This helps keep the cap’s structure intact and prevents it from collapsing.
5. Storage and Maintenance
5.1 Use a Hat Rack or Hook
Avoid Folding or Crushing: Folding or crushing a fitted cap can permanently damage its shape. Instead, hang it on a hat rack or hook that supports the crown and brim. This helps the cap maintain its form when not in use.
Separate from Other Items: Store the cap away from other items that could press against it or cause friction. This prevents scratches, abrasions, and deformation.
5.2 Regular Brushing
Remove Surface Dirt: To reduce the frequency of washing, use a soft-bristled brush to remove surface dirt, dust, and lint from the cap regularly. This helps keep the cap clean and minimizes wear and tear.
Spot Clean as Needed: For minor spills or stains, spot clean the cap immediately to prevent the stains from setting in. This extends the time between deep cleanings and prolongs the cap’s life.


