NameDescriptionContent


0086-13412153176


Can You Wash Baseball Caps? A Tabular Guide to Removing Sweat Stains
来源:
|
作者:Luke
|
发布时间 :2025-05-26
|
249 次浏览:
|
🔊 Click to read aloud
❚❚
▶
|
Share:
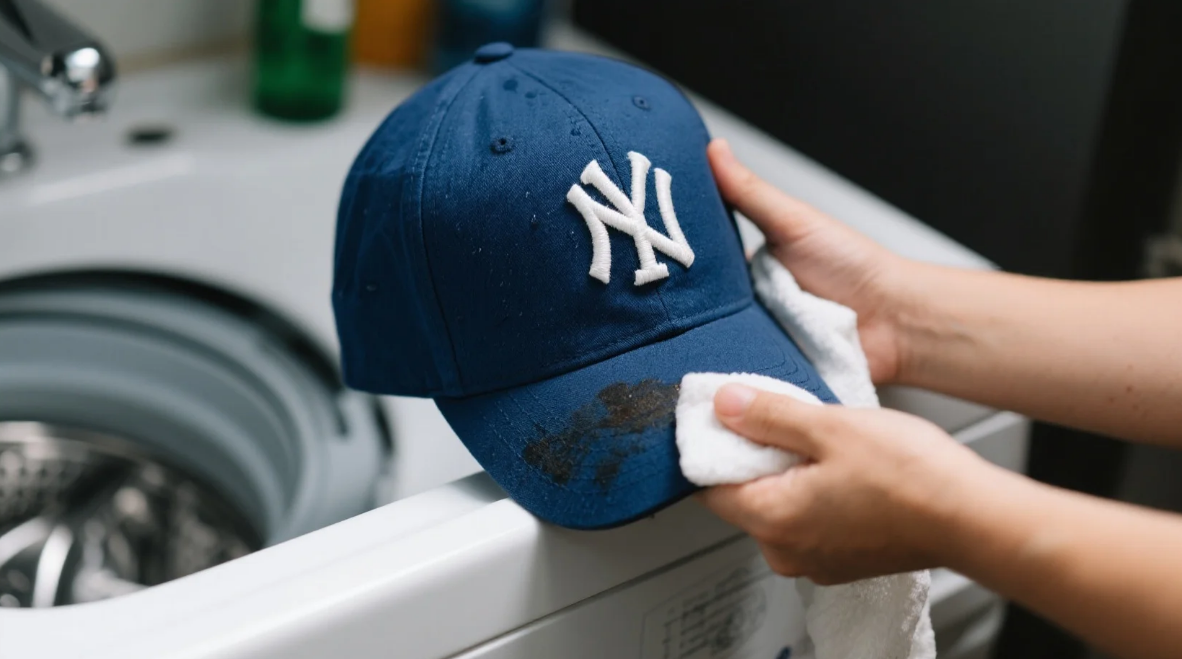
Baseball caps often get sweat stains over time. The answer to “Can you wash baseball caps?” is yes, and the key is using the right methods. The guide details a step - by - step process: First, in the preparation phase, check the cap's material and care label, gather cleaning supplies like mild detergent and avoid harsh chemicals, and remove excess dirt. For pre - treatment of sweat stains, assess stain severity and choose from options like baking soda paste, vinegar solution, or lemon juice. When washing the cap, prepare a mild soapy solution with lukewarm water, submerge and soak the cap, gently scrub it, and rinse thoroughly with cold water. For drying and shaping, remove excess water without wringing, reshape the cap while wet, air dry it away from heat and sunlight, and flip it during drying. After cleaning, inspect the cap for remaining stains, store it properly on a hat rack or in a box, and perform regular maintenance with a soft - bristled brush. Adapt the process according to the cap's material and condition for best results.
Can You Wash Baseball Caps? A Tabular Guide to Removing Sweat Stains
Baseball caps often accumulate sweat stains over time, affecting their appearance and comfort. While the question “Can you wash baseball caps?” has a resounding yes, the key lies in using the right methods to tackle sweat stains effectively. Below is a step-by-step tabular guide detailing my personal process for cleaning sweat stains off baseball caps, ensuring a fresh and restored look without damaging the cap.
1. Preparation Phase
Step | Action | Materials/Items Needed | Key Considerations |
1.1 | Check the Cap's Material and Care Label | The baseball cap itself | Identify if the cap is made of cotton, polyester, wool, leather, or a blend. Follow any specific washing instructions on the care label. If no label exists, proceed with caution and choose a gentle cleaning method suitable for the material. |
1.2 | Gather Cleaning Supplies | Mild liquid detergent, baking soda, white vinegar, lemon juice (optional), soft-bristled brush, sponge, basin or sink, warm water, cold water, clean towels | Select a mild detergent appropriate for the cap's material. Avoid using bleach or harsh chemicals that can damage the fabric or color. For natural stain removers, have baking soda, vinegar, or lemon juice on hand. |
1.3 | Remove Excess Dirt and Debris | Soft-bristled brush or lint roller | Gently brush or roll the surface of the cap to remove any loose dirt, dust, or lint. This step prevents the debris from spreading or embedding deeper into the fabric during the cleaning process. |
2. Pre-Treatment for Sweat Stains
Step | Action | Materials/Items Needed | Key Considerations |
2.1 | Assess the Stain Severity | None | Examine the sweat stains on the sweatband, crown, or other areas of the cap. Determine if the stains are light, moderate, or heavy to choose the most effective pre-treatment method. |
2.2 | Apply a Stain Remover (Option 1: Baking Soda Paste) | Baking soda, water, small bowl, spoon | Mix 2 - 3 tablespoons of baking soda with enough water to form a thick paste. Apply the paste directly to the sweat stains, covering them evenly. Let the paste sit on the stains for 15 - 20 minutes to break down the sweat and grime. |
2.3 | Apply a Stain Remover (Option 2: Vinegar Solution) | White vinegar, water, spray bottle | Dilute equal parts of white vinegar and water in a spray bottle. Spray the solution generously over the sweat stains. Allow the vinegar to penetrate the stains for 10 - 15 minutes. Vinegar helps to dissolve sweat and remove odors. |
2.4 | Apply a Stain Remover (Option 3: Lemon Juice) | Fresh lemon, cutting board, knife (if needed) | Squeeze fresh lemon juice directly onto the sweat stains. Place the cap in a well-lit area with sunlight (if possible) for a few hours. The UV rays from the sun combined with the lemon juice can act as a natural bleaching agent for light stains. |
3. Washing the Cap
**
Step | Action | Materials/Items Needed | Key Considerations |
3.1 | Prepare the Washing Solution | Basin or sink, warm water, mild liquid detergent | Fill a basin or sink with lukewarm water. Add a small amount (about 1 - 2 tablespoons) of mild liquid detergent and stir gently to create a soapy solution. Avoid using hot water, as it can cause shrinkage or fading, especially for cotton or wool caps. |
3.2 | Submerge and Soak the Cap | The pre-treated cap | Place the cap in the soapy water, ensuring it is fully submerged. Let it soak for 5 - 10 minutes to loosen the dirt and sweat stains. For caps with stiff brims, be careful not to bend or damage the brim during this step. |
3.3 | Gently Scrub the Cap | Soft-bristled brush, sponge | Use a soft-bristled brush or a sponge to gently scrub the cap, focusing on the stained areas, sweatband, and the overall surface. Avoid vigorous scrubbing, as it can stretch or damage the fabric. For stubborn stains, you can apply a bit more pressure, but still be gentle. |
3.4 | Rinse Thoroughly | Basin or sink, cold water | Drain the soapy water and refill the basin or sink with cold water. Rinse the cap under running cold water or submerge it in the cold water, squeezing gently to remove all the soap. Make sure to rinse until the water runs clear, indicating that all the detergent has been removed. |
4. Drying and Shaping the Cap
Step | Action | Materials/Items Needed | Key Considerations |
4.1 | Remove Excess Water | Clean towels | Place the rinsed cap on a clean towel. Gently press the cap with another towel to absorb as much excess water as possible. Do not wring or twist the cap, as this can cause it to lose its shape, especially for caps with structured brims. |
4.2 | Reshape the Cap | None | While the cap is still wet, reshape it back to its original form. For caps with curved brims, you can gently curve the brim with your hands. For caps with a specific crown shape, mold the crown to its proper shape. |
4.3 | Air Dry the Cap | Hat rack, flat surface, or clothesline | Place the reshaped cap on a hat rack, a clean flat surface, or hang it on a clothesline to air dry. Ensure the cap is in a well-ventilated area away from direct sunlight or heat sources. Avoid using a clothes dryer, as the heat can damage the fabric, shrink the cap, or warp the brim. |
4.4 | Flip and Monitor During Drying | None | Periodically flip the cap during the drying process to ensure even drying. Check the cap regularly to make sure it maintains its shape. If the cap starts to lose its shape slightly, you can gently reshape it again while it's still damp. |
5. Post-Cleaning Checks and Maintenance
Step | Action | Materials/Items Needed | Key Considerations |
5.1 | Inspect the Cap | None | Once the cap is completely dry, examine it for any remaining sweat stains or signs of damage. If stains persist, you may need to repeat the pre-treatment and washing steps. |
5.2 | Store the Cap Properly | Hat rack, hook, or hat box | To prevent future staining and maintain the cap's shape, store it on a hat rack, a hook, or in a hat box. Keep the cap in a cool, dry place away from moisture and direct sunlight. |
5.3 | Regular Maintenance | Soft-bristled brush | To reduce the frequency of deep cleaning, use a soft-bristled brush to remove surface dirt and debris from the cap regularly. This helps to keep the cap looking clean and extends its lifespan between washes. |
By following this tabular guide and using the right methods for each step, you can effectively remove sweat stains from your baseball caps and keep them looking fresh and clean. Remember to always adapt the process based on your cap's specific material and condition for the best results.i
For more questions subscribe
to our email


Quick Links


Dongguan Fitwell Headwear & Bag Co.. Ltd.
was established in 2014. It has 100 well-trained employees and 2,000 square meters of modern factory buildings. It is an enterprise integrating design, pattern making, production, processing, packaging and sales. It is located in the beautiful and prosperous Dongguan.