

How to Fix 3 Failed Samples forStreet Wear Black 5Panel Custom 3D Embroidered Snapback Hats
Launching a new line ofstreet wear black 5panel custom 3d embroidered snapback hatsfor your Australian brand? You’re not alone if 3 rounds of samples still miss the mark.
Many streetwear hat wholesalers and startup founders face this exact pain point: embroidery depth is off, fabric feels cheap, or the fit doesn’t match your brand’s urban vibe.
This guide breaks down the root causes of sample failures and actionable fixes to get your 5 panel snapback hat approved on the next round.
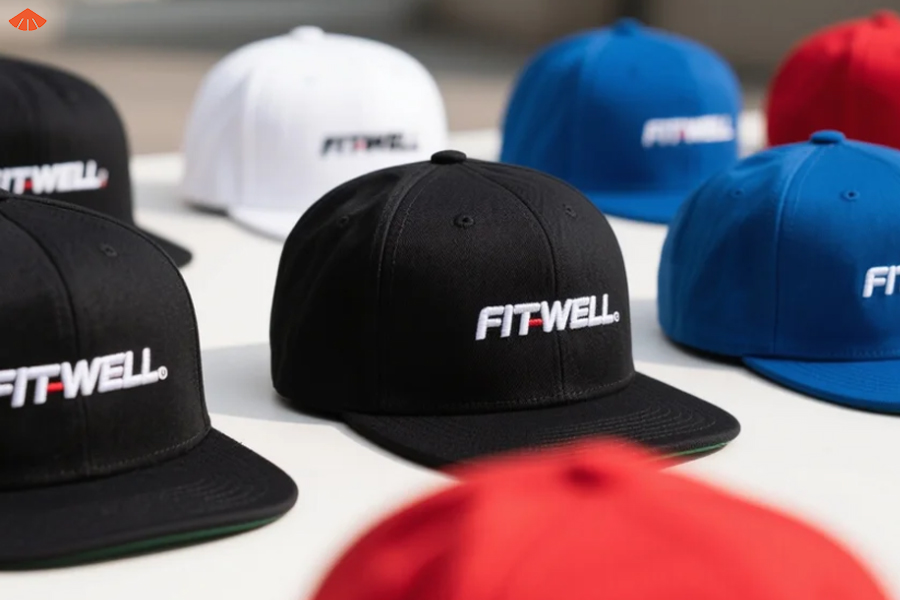
Why 3 Rounds of Samples for Custom Embroidered Hats Keep Failing
Most sample rejections stem from misaligned expectations, not poor factory work. Let’s dig into the two most common causes.
Misaligned 3D Embroidery Specifications
Chunky 3D puff embroidery is the signature of premium urban streetwear pieces, but vague specs lead to flat, lopsided, or peeling designs.
Common embroidery mistakes: incorrect puff foam thickness, wrong thread count, misaligned logo placement
Why it happens: brands share only a JPG logo, no spec sheet with stitch count or foam density requirements
For example, anurban streetwear black 5 panel snapback hat with chunky 3d embroideryneeds 3mm foam for bold lift, but many factories default to 1.5mm foam to cut costs.
The result? A flat design that looks nothing like your reference mockup.
Even small details like stitch direction can change the look of your logo under natural light.
Unclear Fabric & Structure Requirements
The fabric and build of your hat define its durability and street credibility—vague fabric requests lead to cheap, flimsy samples.
Common structure mistakes: wrong crown height, flimsy brim insert, mismatched under visor color
Why it happens: brands say “black cotton hat” instead of specifying weight, weave, and material composition
Ablack 5 panel cotton twill snapback with green undervisor and 3d logoneeds 1080g cotton twill for structure, but factories may use 680g lightweight fabric for samples.
The green under visor may also be the wrong shade—neon green instead of the classic dark green streetwear fans expect.
Fit is another overlooked factor: standard adult sizes run54-58cm, but some factories cut crowns 1cm smaller for lower fabric usage.
This tiny difference makes the hat sit too high on the head, ruining the classic flat bill silhouette.
Step-by-Step Fixes to Approve YourBlack Flat Brim SnapbackSample
Fixing sample failures doesn’t mean switching factories—it means tightening your specification process and adding clear checkpoints.
Build a Bulletproof Sample Spec Sheet
A detailed spec sheet eliminates 80% of sample errors by leaving zero room for factory interpretation.
Include these non-negotiable details in every spec sheet:
Material composition: 100% cotton twill or 100% acrylic, with exact weight (e.g., 1080g cotton twill)
Embroidery specs: foam thickness (3mm for chunky 3D), stitch count, thread color Pantone code, logo placement (1cm above brim center)
Structure details: crown height (11cm standard), brim curvature (0 degrees for flat bill), under visor color Pantone code
Size specs:
54-58cmadjustable snapback, with exact crown panel dimensions
Finishing details: plastic snap type, inner taping brand, woven label placement
For acustom 100% acrylic black 5 panel flat bill snapback with 3d logo, specify acrylic grade (virgin vs. recycled) to avoid scratchy, low-quality fabric.
Attach high-res vector files of your logo, not JPGs—vector files ensure clean, precise embroidery edges.
Add a physical reference sample if you have one: send a competitor’s 3d embroidery snapback you love so the factory can match the exact feel and lift.
Label every detail on the reference sample with a marker to avoid misinterpretation.
Implement a Mid-Sample Approval Checkpoint
Don’t wait for the full sample to arrive to catch mistakes—add a mid-production check to fix issues early.
Here’s how the checkpoint process works:
Step 1: Factory sends photos of cut panels and embroidered logo before assembling the hat
Step 2: You approve embroidery placement, color, and puff height within 48 hours
Step 3: Factory assembles the full sample and ships it for final review
This checkpoint cuts sample rounds by 50% for most5 panel hat customprojects, according to our 2024 factory partner data.
For streetwear brands launching 4+ styles a year, this saves an average of 6 weeks of product development time.
Ask for close-up photos of the embroidery from 3 angles: front, side, and top-down.
Side photos are critical for verifying 3D puff height—flat photos can make thin foam look thicker than it is.
How to Choose the Right Factory for Your 5 Panel Snapback Hat Line
Even with perfect specs, the wrong factory will keep producing bad samples. Here’s how to vet suppliers that specialize in streetwear headwear.
Vet Factory Specialization & Streetwear Experience
General hat factories make 20+ styles, but streetwear-specific factories focus on flat bill snapback hats and 3D embroidery.
Ask these 3 questions to vet specialization:
What percentage of your production is streetwear-style 5 panel snapbacks? (Aim for 60%+)
Can you share 3 references from streetwear hat wholesaler or brand clients?
What’s your standard 3D embroidery foam thickness for premium streetwear lines?
A factory that regularly works with 5 panel snapback distributor clients will already know standard streetwear specs, like green under visors and plastic snap closures.
They’ll also have access to high-quality puff foam and experienced embroidery technicians.
Avoid factories that specialize in golf hats or dad hats—they lack the equipment and expertise for crisp chunky 3D embroidery.
A quick look at their website portfolio will tell you if streetwear is their core focus.
Verify Quality Control Processes for Custom Logo&Color Orders
Small QC gaps lead to repeated sample failures, especially for custom logo&color orders with strict brand standards.
Look for these QC processes in a reliable factory:
In-house embroidery digitizing team (outsourced digitizing leads to misaligned designs)
3-point sample check: post-embroidery, post-assembly, pre-shipping
Color matching protocol: Pantone color verification for fabric, thread, and under visor
Size consistency check: every sample measured against
54-58cmsize spec
For custom embroidered headwear importer clients, ask about lab testing options for fabric shrinkage and color fastness.
Imported hats that fade after one wash will destroy your brand’s reputation with customers.
Request a QC report with every sample—factories with strong processes will provide this automatically.
If a factory pushes back on QC checks, it’s a red flag that they cut corners on production.
Cost & Timeline Tips to Launch Your Streetwear Hat Line Fast
Fixing sample issues doesn’t have to blow your budget or delay your launch. Use these tips to stay on track.
Optimize Sample Costs Without Sacrificing Quality
Sample fees add up fast, especially when you’re ordering multiple rounds of custom embroidered hats.
Use these strategies to cut sample costs:
Order 2-3 styles in the same fabric to share setup fees
Ask for a sample credit: most factories deduct sample fees from your first bulk order over 500 units
Use in-stock black fabric for samples instead of custom dyed fabric (custom dye adds $3-$5 per sample)
For ablack flat brim snapbackline with 3 colorways, start with one black sample to test embroidery and fit.
Once that’s approved, order colored samples to verify dye lots—this cuts sample costs by 40%.
Avoid cheap sample services that offer $10 custom hats—they use low-quality foam and thin fabric that won’t match bulk production.
You’ll end up paying more in re-samples than you save on the initial low fee.
Shorten Launch Timelines for Startup Founders
Australian streetwear startups often lose momentum waiting for sample approvals.
Follow this timeline to launch your hat line in 8 weeks or less:
Week 1: Finalize spec sheet and select factory
Week 2: Receive digital embroidery mockup and approve
Week 3: Mid-sample embroidery check and approve
Week 4: Receive first physical sample and approve
Weeks 5-7: Bulk production
Week 8: Shipping and quality check upon arrival
For streetwear hat wholesaler clients ordering 1000+ units, ask for a 10% production rush for an extra 5% fee.
This cuts production time by 7-10 days without sacrificing quality control.
Build 1 week of buffer time into your timeline for unexpected delays, like customs holds or fabric shortages.
Buffer time ensures you won’t miss launch dates even if a small issue pops up.
Final Thoughts
Gettingstreet wear black 5panel custom 3d embroidered snapback hatssamples right doesn’t have to take 4+ rounds.
With a detailed spec sheet, mid-sample checkpoints, and the right factory partner, you can approve your sample on the next round and launch on schedule.
Whether you’re a streetwear startup founder, a 5 panel snapback distributor, or a custom embroidered headwear importer, these steps will cut your sample time and costs.
Start by updating your spec sheet today—small details make all the difference in premium streetwear headwear.
Interested in custom cap solutions? Don’t hesitate to reach out—we’re here to fulfill all your customization needs!
Follow & Message Us:
Facebook:https://www.facebook.com/fitwell.li
Instagram: www.instagram.com/fitwellcustomhats.dds/
LinkedIn:http://www.linkedin.com/in/fitwellcustom-hats-38a2b9b0/
Pinterest: http://www.pinterest.com/FitwellCustomHatsdds/
YouTube: http://www.youtube.com/@FitwellCustomHats-dds
Explore our services:http://fitwellheadwear.en.alibaba.com
WhatsApp us now: https://psce.pw/86jwa3